Citrix install on Windows
Please use the Citrix installation instructions below if you are trying to install on an Windows PC.
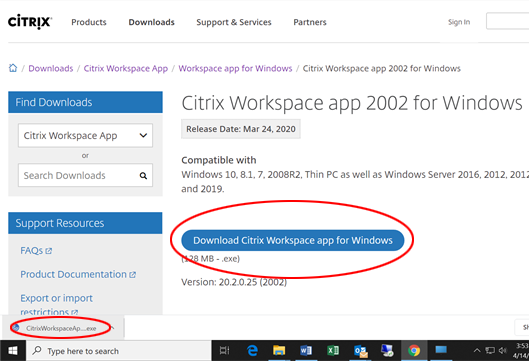
- Please download “Citrix Workspace App for PC”. You can find it here https://www.citrix.com/downloads/workspace-app/windows/workspace-app-for-windows-latest.html.
- Click the blue “Download Citrix Workspace app for Windows” button. Please wait until the download is finished. Once finished please click 1 time on “CitrixWorkSpaceApp.exe” to start the installation.
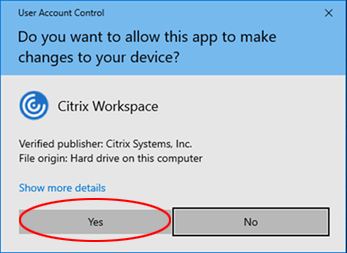
- Please be patient it may take a 10 seconds for it to launch. Click “YES”.
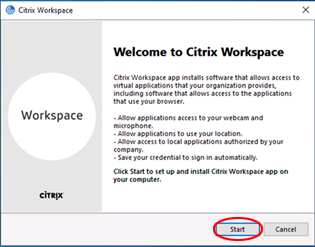
- At the Welcome page, click Start.
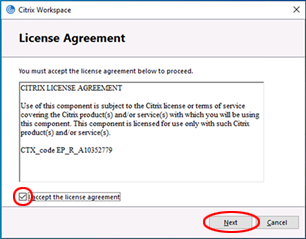
- At License Agreement page, select I accept the license agreement, click Next.
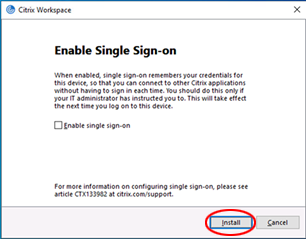
- Do NOT Enable Signal Sign-on page, click Install.
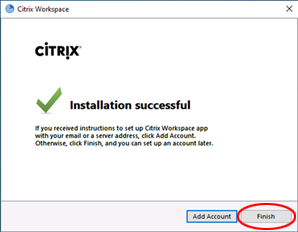
- Do NOT “ADD ACCOUNT” – hit “finish”.
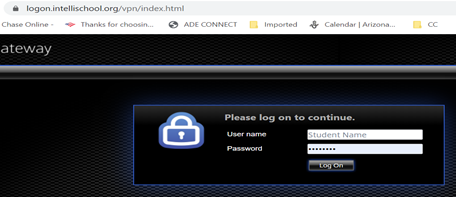
- Now that Citrix is installed. Please open a new Google Chrome Browser and go to our website www.intellischool.org > “Online Classes” > and “ALS Classwork” to log into the Citrix Store Front or you can go directly to https://logon.intellischool.org.
- Login Using your Intelli School username and password.
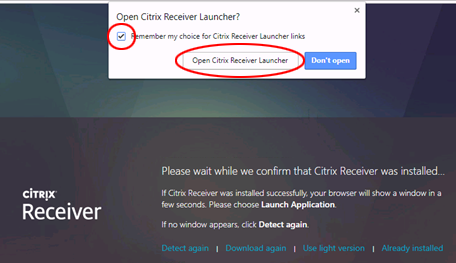
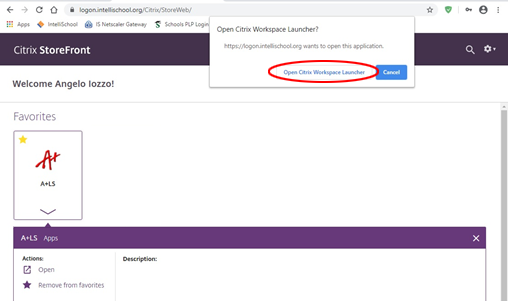
- Click on “Remember my choice…” and then click “Open Receiver…”
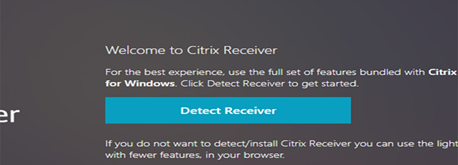
- If the sites asks to “detect receiver” hit “ok”
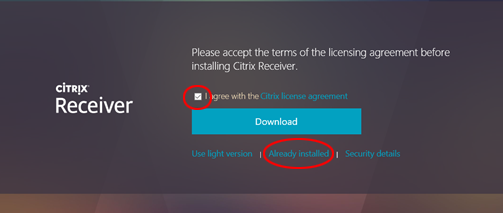
- Click on “Agree” THEN HIT “ALREADY INSTALLED” DO NOT SELECT DOWNLOAD
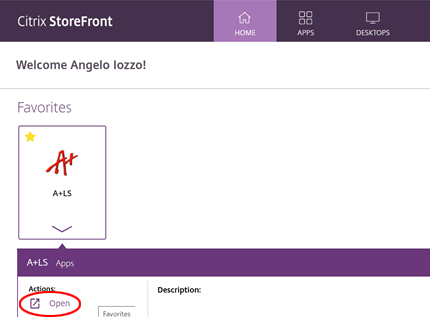
- Click on the ALS APP Icon – hit open icon below
- It MAY create a download, double click on the download to launch ALS. Give it anywhere from 3-10 second to launch ALS. If it asks to open with “Citrix Workspace…” click it.
- If Chrome creates a “download” when hitting “open” on ALS click on that download to launch ALS.
- ALS is now loading, be patient.

- A blue Intelli Screen will appear with an “OK” box. Click ok or hit “enter” on your keyboard to move on.
- Log into ALS using your IS login information.